Editable Type Effects in Illustrator
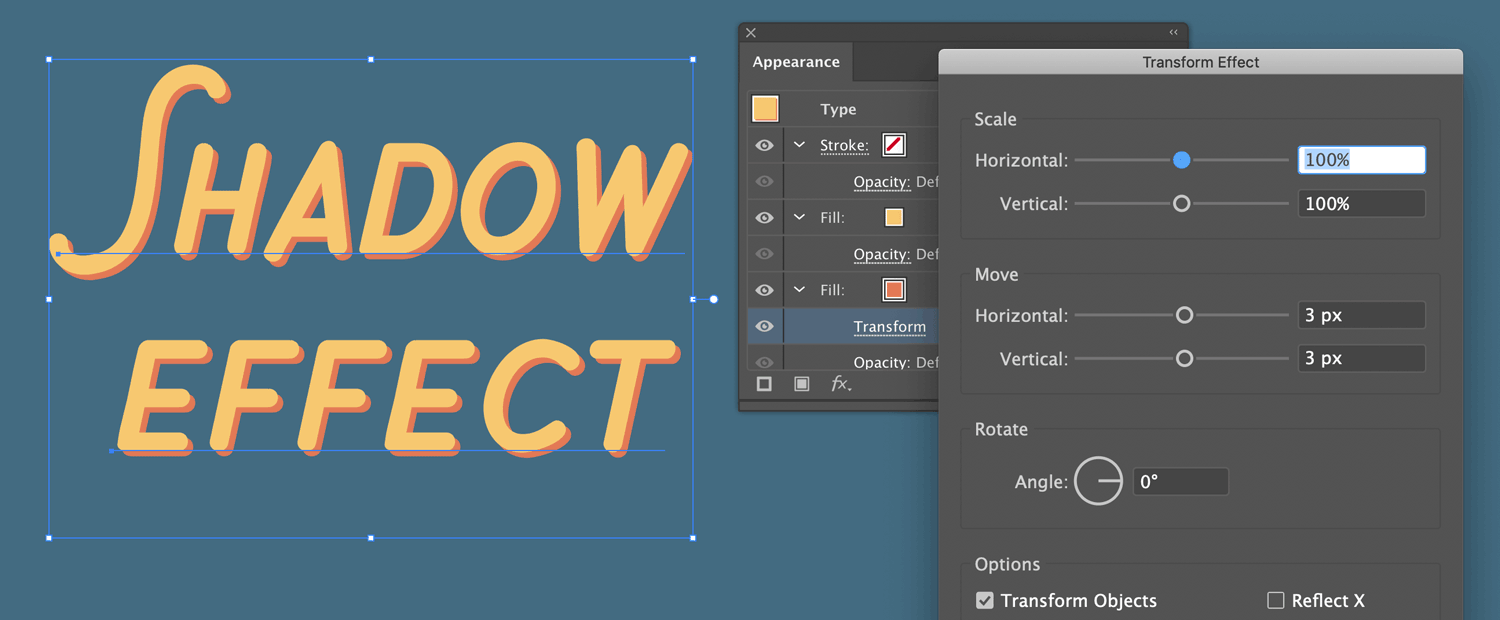
In this simple tutorial, we’re going to create a live type effect in Adobe Illustrator to add depth to type. We’ll make a duplicate fill in the Appearance Panel, and use a Transform Effect to move the fill’s position, changing the depth of the effect. For those who have Appearance Panel experience, the screenshot above tells you all you need to know.
Step-by-step
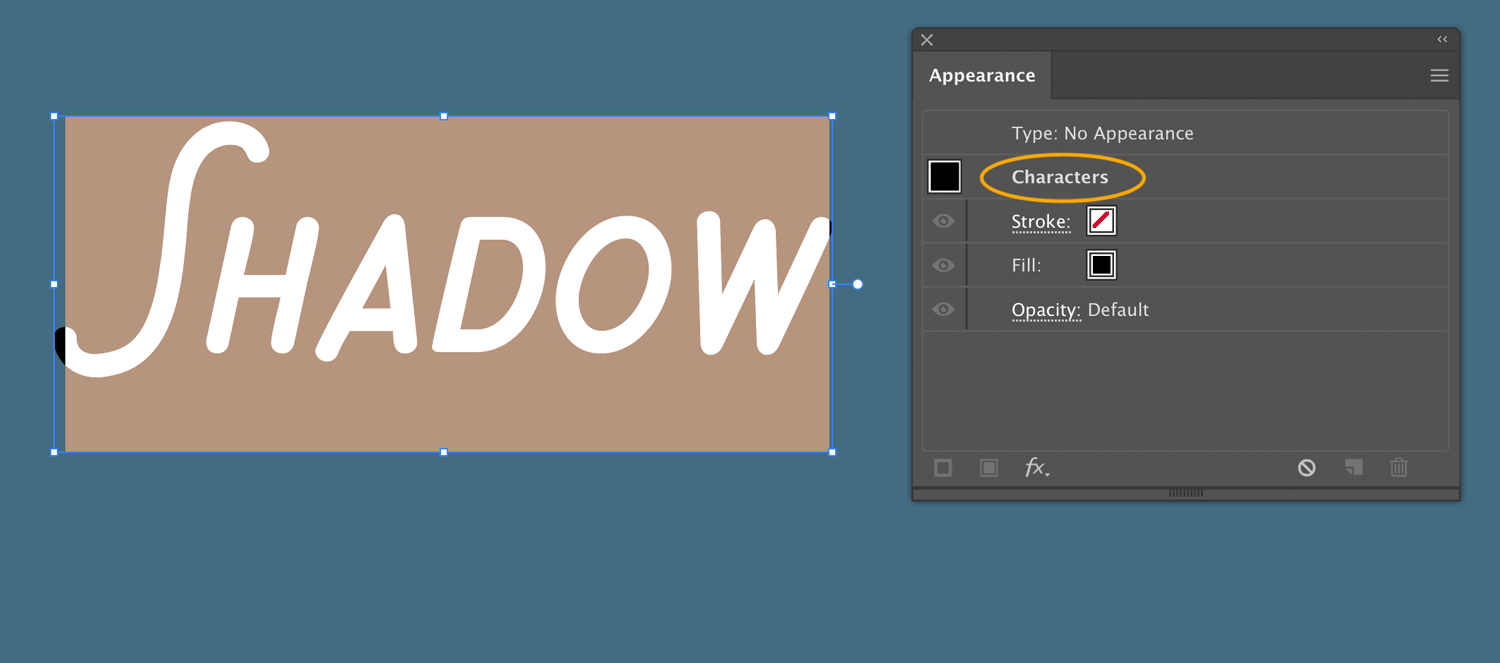
Step 1: Open the Appearance panel, Window > Appearance. Click with the Type tool create a line of point type. Select the type by dragging with the Type tool to highlight the word.
The type object is represented by Type: No Appearance at the top of the Appearance panel. Below that, we see the Characters appearance. The selected characters have a black fill and a stroke set to none. (This is the default type appearance whenever you start typing in Illustrator.) We’re about to remove the character’s appearance and change the appearance of the overall type object.
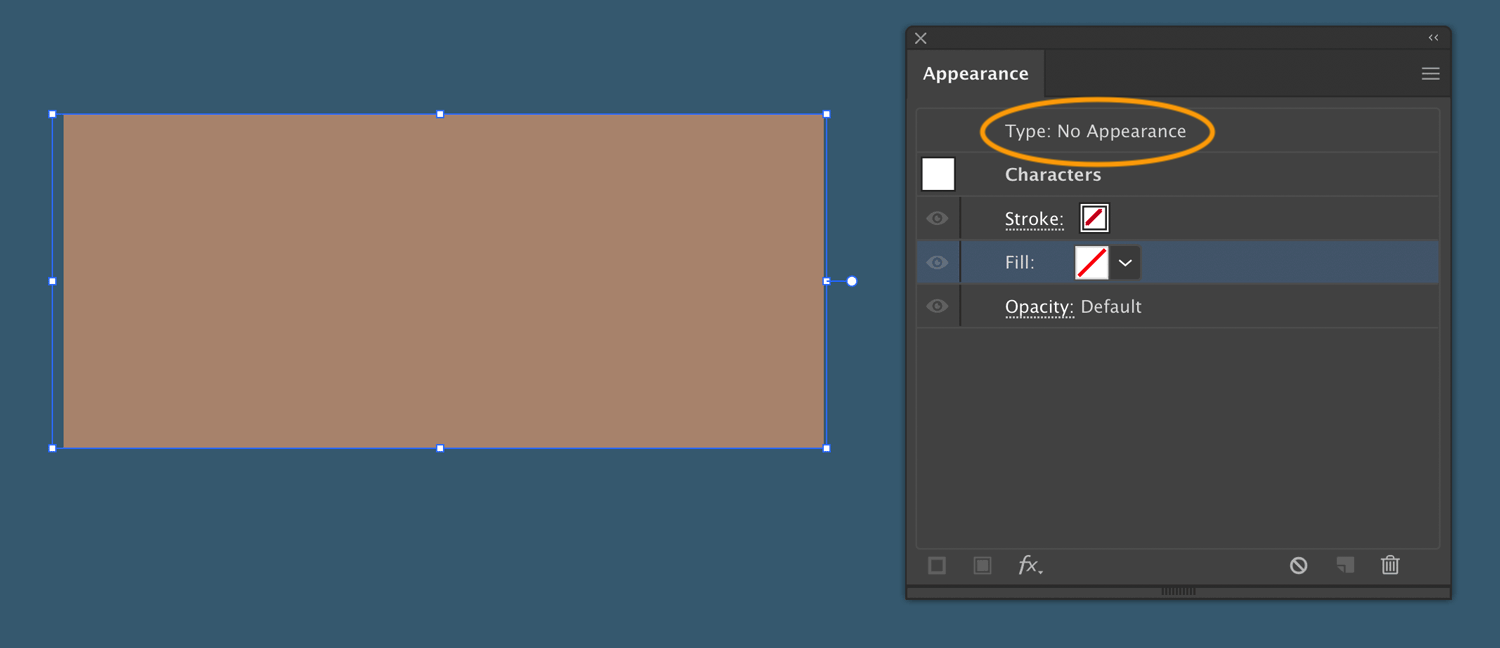
Step 2: Change the fill of the characters to None. The type is now invisible, but it’s still there!
Click on the Appearance Panel at the top where it says Type: No Appearance. We’re switching over to working on the type object appearance now. Notice when you do this, the type is selected by the baseline (as in the image below), as if you had clicked it with the Selection Tool.

Step 3: Note we are now editing the type object’s appearance as indicated at the top of the Appearance panel. Click on the Add New Fill button at the bottom of the Appearance Panel to add a fill.
Then click the Add New Fill button again to add a second fill. Both fills are black by default.

Step 4: Change the color of the two fills. The top fill is yellow and the shadow fill is orange. Because the orange fill is underneath the yellow fill, you can’t see it yet.
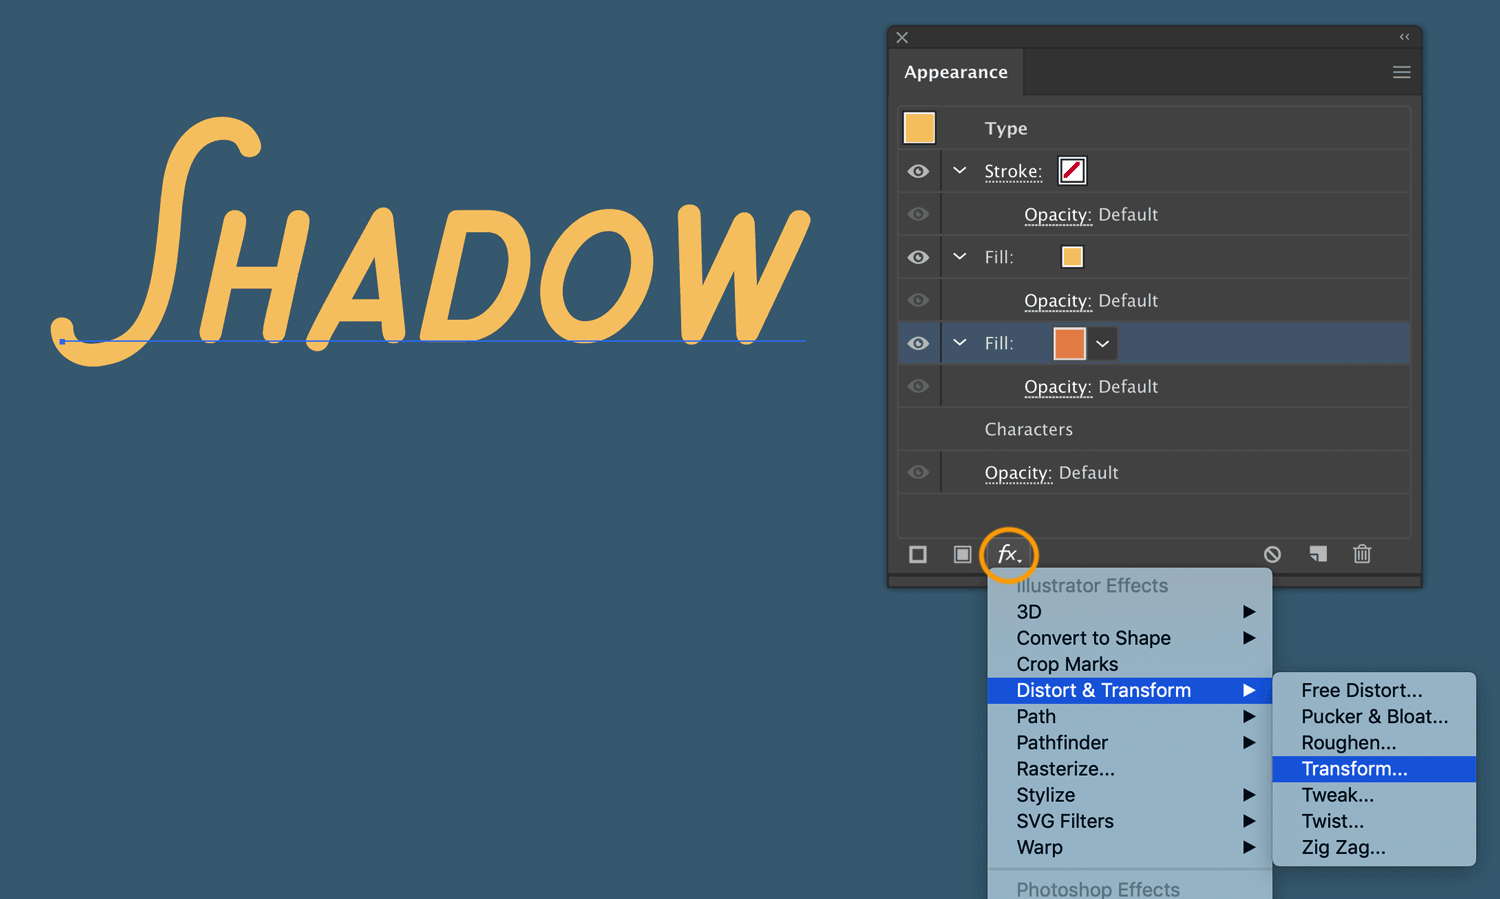
Step 5: Select the orange fill by clicking on it in the Appearance panel, then click the Add New Effect button at the bottom of the panel and choose Distort & Transform > Transform…

Step 6: The Transform Effect panel pops up, check Preview. Then, under Move, set the amount you want to move the orange shadow type fill. I’ve moved mine 3 points to the left and 3 points down. Click OK.
I hope you’ve enjoyed this tutorial on creating a live type effect in Adobe Illustrator. The most important part of the steps above is remembering that the Appearance panel treats type differently than you might expect. Type in the Appearance Panel has a dual nature: Characters and Type. Which one you are editing depends on how you selected it: by highlighting with the Type tool, or with the Selection tool.
Summary: When building up effects on type, start by removing the Characters appearance, then add fills to the Type appearance.
When does this matter? Character appearances are limited. You can’t stack up multiple fills and strokes on the character’s appearance, or add effects. You can’t drag the stroke under the fill either. You are limited to a fill, with a stroke above it, and that’s all you can do. This all happens by default when coloring type. So, to utilize all the features of the appearance panel when working with type, focus on the Type appearance, as we do in the tutorial above.
Font: ChippewaFalls, Adobe Typekit

You may also be interested in these posts: