Illustrator on the iPad
Illustrator on the iPad takes the Pencil tool to another level of vector goodness. Watch my 2 video tutorials for tips on how to create and edit paths in Illustrator on the iPad. Vector art has never been easier to create by freehand drawing because of the flowing curves and beautiful paths you can create on the iPad with Adobe Illustrator and the Pencil tool.
Watch the video above, or keep reading for everything you need to know about drawing freehand in Adobe Illustrator on the iPad!
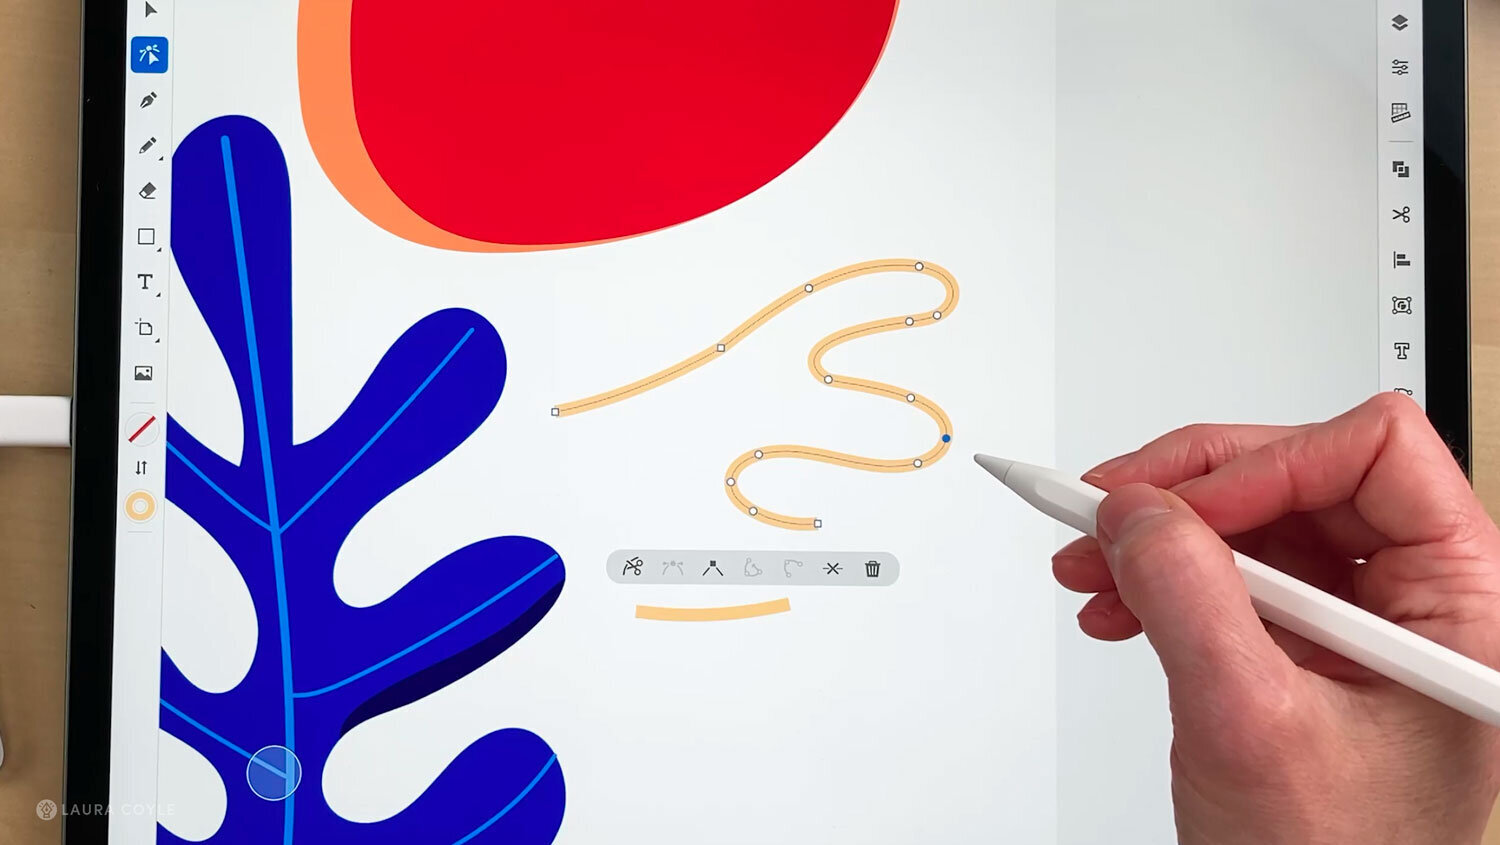
In a nutshell: The Illustrator Pencil tool lays down anchor points as you draw freehand. Change the smoothing level before you start drawing. On a scale from 1 to 10, 1 is the least smoothing, and will more accurately follow your hand movements on the iPad. A smoothing level of 10 will create very rounded curves. In my tutorial I set the smoothing to 6 for a combination of smoothness and accuracy.
Tips for Drawing with the Pencil Tool
Drag to create freehand lines
Tap to create straight segments
Tap and drag on an end point to continue drawing a path
Draw then pause briefly to create a corner point and change direction
Corner Points and Smooth Points in Illustrator on the iPad
Select your path with the Direct Selection tool to work with the anchor points and curve handles. Smooth points create curves and have round indicators. Corner points have square indicators.
Learn tips for editing paths, anchor points and curves in Illustrator on the iPad.
Illustrator on the iPad Shortcuts
When using the Direct Selection tool, Double-tap on an anchor to convert it to corner or smooth.
Use the inner touch shortcut ring to break a curve handle.
You may also be interested in these posts: